Difference between revisions of "Drawing a smiley face, part 1"
| Line 25: | Line 25: | ||
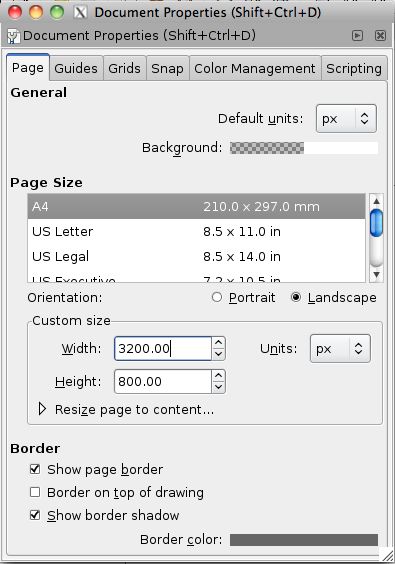
'''3.''' In the Document Properties dialog box, make a few changes. First, select pixels ("px") as the default units. Ignore the list of standard page sizes, and instead enter Width: 3200 and Height: 800 (pixels) for the custom page size. Close the box to apply the values and change the page size. | '''3.''' In the Document Properties dialog box, make a few changes. First, select pixels ("px") as the default units. Ignore the list of standard page sizes, and instead enter Width: 3200 and Height: 800 (pixels) for the custom page size. Close the box to apply the values and change the page size. | ||
| + | |||
| + | http://wiki.evilmadscience.com/s3/eggbot/smileytut/4.jpg | ||
3200 pixels wide represents a full rotation of an egg (or other round object) in the Eggbot-- 3200 motor steps. 800 pixels (800 motor steps) represents a typical value for the available range of motion for the Eggbot pen arm; the actual travel varies depending on object shape, size, pen type, and other factors. | 3200 pixels wide represents a full rotation of an egg (or other round object) in the Eggbot-- 3200 motor steps. 800 pixels (800 motor steps) represents a typical value for the available range of motion for the Eggbot pen arm; the actual travel varies depending on object shape, size, pen type, and other factors. | ||
| − | + | As an alternative to manually entering a page size, you may prefer to use one of the existing Eggbot templates-- just an Inkscape document saved with the page size already set to these values. However, even if you do use the template, it's still nice to know how to change the page size and default units! | |
| + | |||
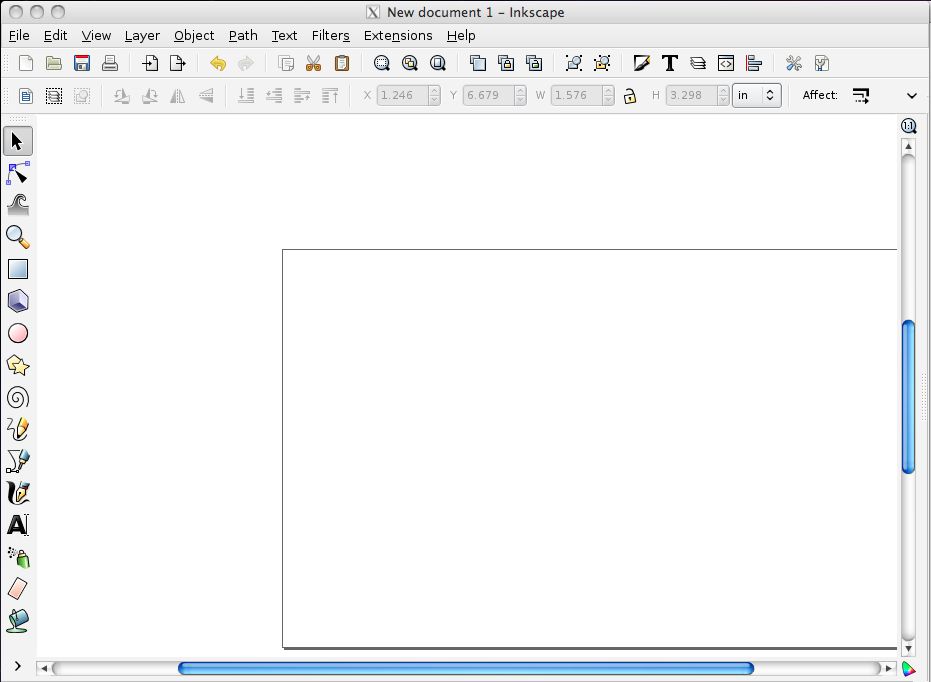
| + | '''4.''' Your document will probably look something like this: | ||
| − | + | http://wiki.evilmadscience.com/s3/eggbot/smileytut/5.jpg | |
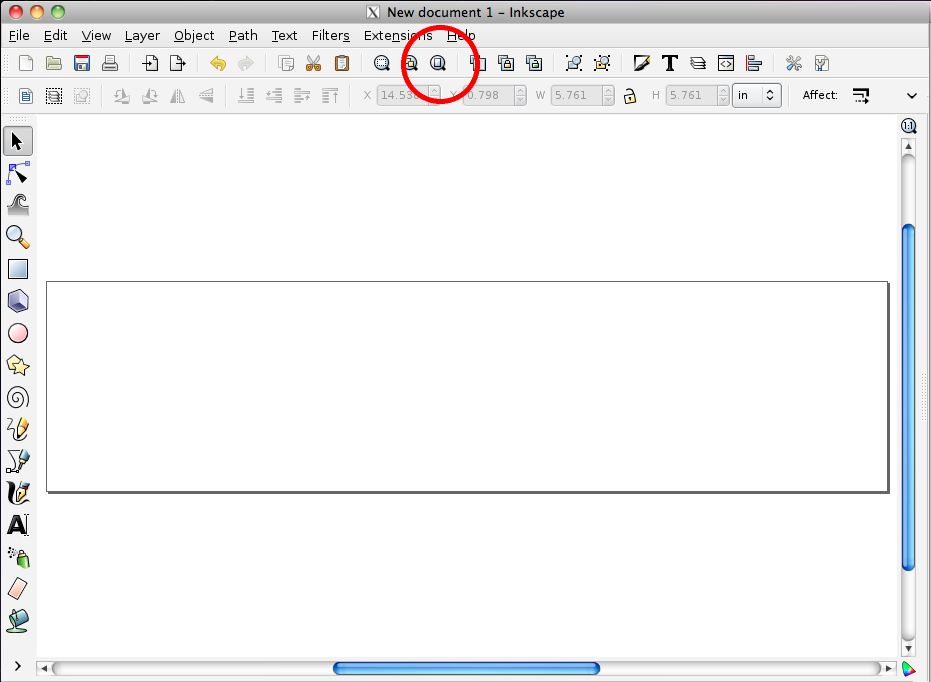
| + | In words, the page size spills out of the area that we're currently viewing. To fix this, you can use the "zoom to fit page in window" button in the toolbar (highlighted in the next picture) to change the view, and scale the entire page to be in view. You can also select View > Zoom > Page to do the same thing. | ||
| + | http://wiki.evilmadscience.com/s3/eggbot/smileytut/6.jpg | ||
| + | '''5.''' Let's draw an object. | ||
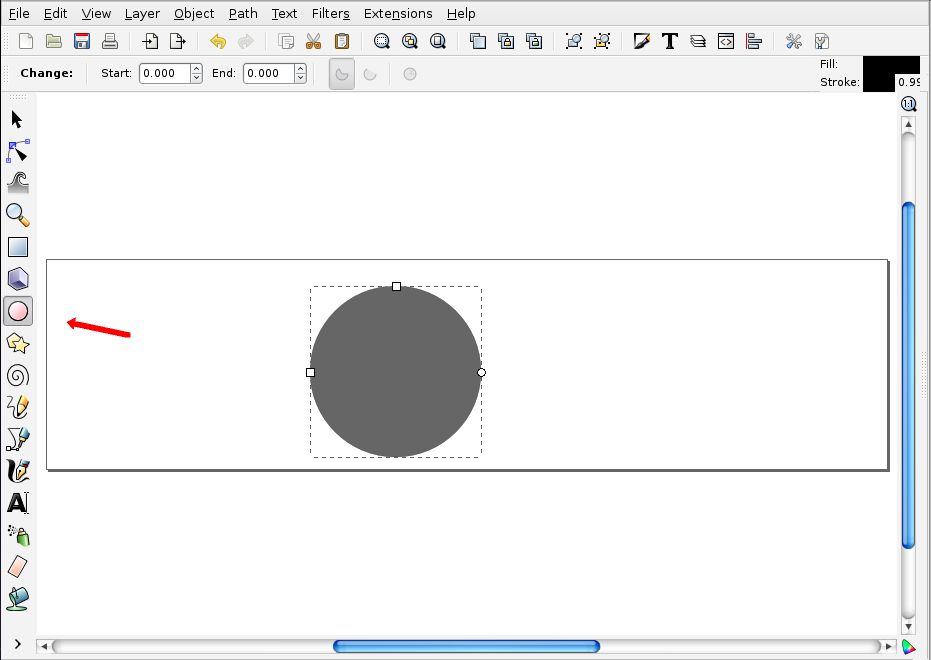
| + | Select the circle tool from the left toolbar. (Formally, it's the "Create circles, ellipses, and arcs" tool.) Use it to drag a circle in the middle of the page, roughly 2/3 - 3/4 as tall as the page. Tip: Hold down the control-key while dragging to make a perfect circle. | ||
| + | http://wiki.evilmadscience.com/s3/eggbot/smileytut/8.jpg | ||
| + | If you're not happy with the shape of your circle, you can delete it (delete key, or Edit>Delete in the menu) and start over. | ||
| + | Depending on the settings at your computer, your circle may show up with a different stroke (pen color) and fill color than shown here; we'll get to that next. | ||
| + | '''6.''' The fill and stroke pane | ||
Revision as of 01:17, 19 September 2010
This is part 1 of a tutorial, making a simple drawing in Inkscape and formatting it for the Eggbot.
<<< Introduction (part 0) || Smiley Face Tutorial || Part 2 >>>
1. First, open up Inkscape. You should see a window that looks like a drawing of a blank page. Our first task in the tutorial is to make sure that your window looks like ours-- that you have the same sets of toolbars available.
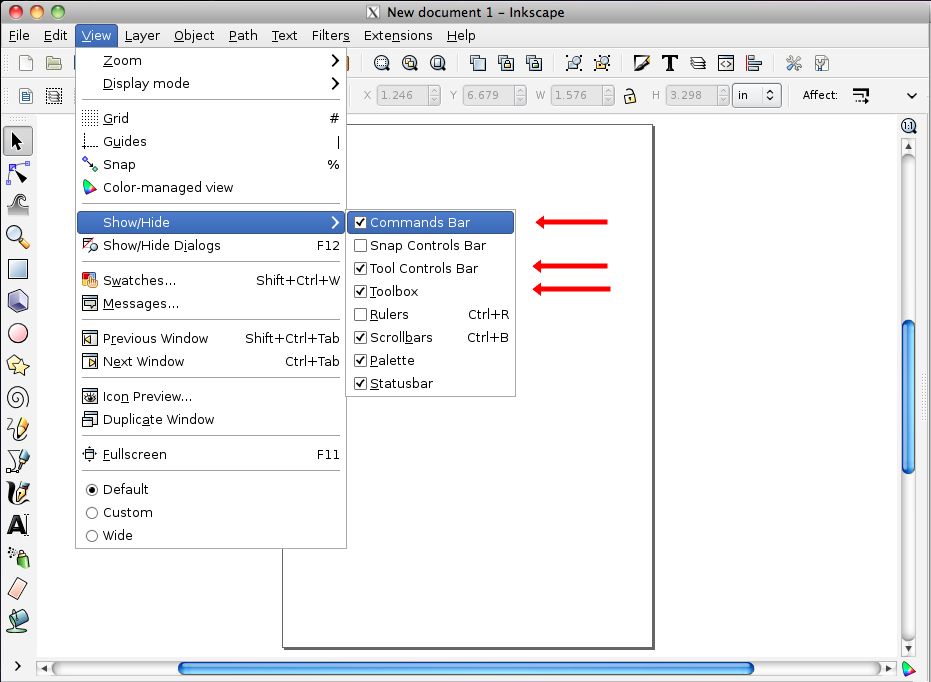
From the "View" menu, under the heading "Show/Hide," you can select which toolbars are visible. Make sure that the three indicated ones are visible: Commands bar, Tool Controls bar, and Toolbox. These are the two toolbars at the top of the screen here and the sidebar visible on the left side. In the likely case that your screen already shows these three toolbars, you won't need to change anything.
Mac users: You will note that the Inkscape menus are the ones within the Inkscape window, and are separate from the system menu bar at the top of the screen.
2. Next, we want to change the document size to better represent the drawing region of the Eggbot. From the File menu, select Document Properties:
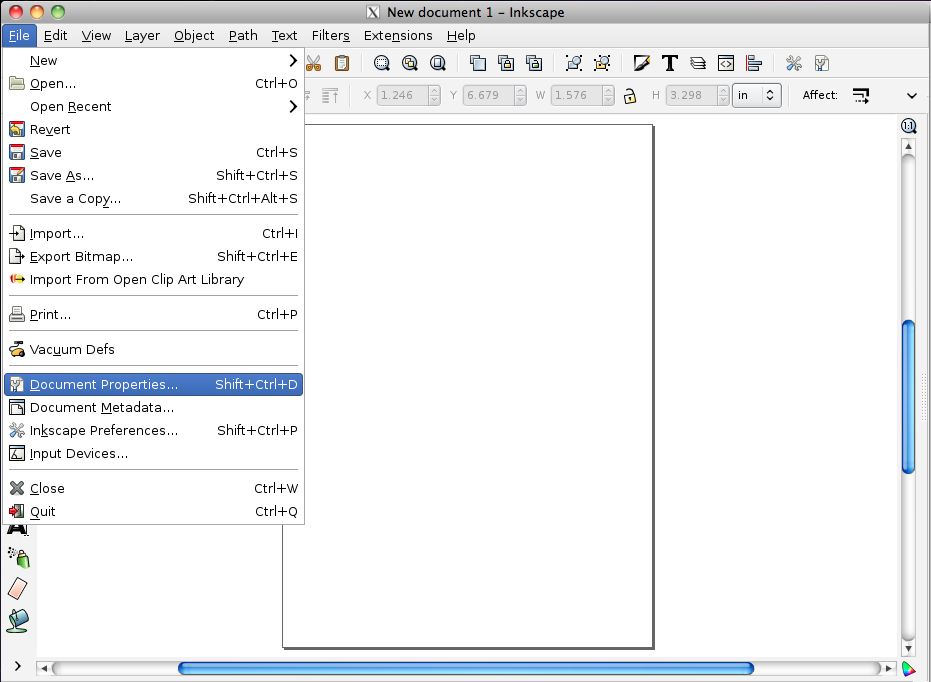
You can also access the Document Properties dialog with Shift-Ctrl-D, or by pressing the rightmost icon in the upper toolbar (the one that looks like a page with the corner folded over).
(Mac users: Here and from here on out, we really do mean the control key, not the command key.)
3. In the Document Properties dialog box, make a few changes. First, select pixels ("px") as the default units. Ignore the list of standard page sizes, and instead enter Width: 3200 and Height: 800 (pixels) for the custom page size. Close the box to apply the values and change the page size.
3200 pixels wide represents a full rotation of an egg (or other round object) in the Eggbot-- 3200 motor steps. 800 pixels (800 motor steps) represents a typical value for the available range of motion for the Eggbot pen arm; the actual travel varies depending on object shape, size, pen type, and other factors.
As an alternative to manually entering a page size, you may prefer to use one of the existing Eggbot templates-- just an Inkscape document saved with the page size already set to these values. However, even if you do use the template, it's still nice to know how to change the page size and default units!
4. Your document will probably look something like this:
In words, the page size spills out of the area that we're currently viewing. To fix this, you can use the "zoom to fit page in window" button in the toolbar (highlighted in the next picture) to change the view, and scale the entire page to be in view. You can also select View > Zoom > Page to do the same thing.
5. Let's draw an object.
Select the circle tool from the left toolbar. (Formally, it's the "Create circles, ellipses, and arcs" tool.) Use it to drag a circle in the middle of the page, roughly 2/3 - 3/4 as tall as the page. Tip: Hold down the control-key while dragging to make a perfect circle.
If you're not happy with the shape of your circle, you can delete it (delete key, or Edit>Delete in the menu) and start over.
Depending on the settings at your computer, your circle may show up with a different stroke (pen color) and fill color than shown here; we'll get to that next.
6. The fill and stroke pane
<<< Introduction (part 0) || Smiley Face Tutorial || Part 2 >>>