Difference between revisions of "Drawing a smiley face, part 3"
| (One intermediate revision by the same user not shown) | |||
| Line 1: | Line 1: | ||
| + | {{EggBotDocs}} | ||
| + | |||
| + | |||
This is part 3 of [[Drawing a smiley face|a tutorial]], making a simple drawing in Inkscape and formatting it for the Eggbot. | This is part 3 of [[Drawing a smiley face|a tutorial]], making a simple drawing in Inkscape and formatting it for the Eggbot. | ||
| Line 16: | Line 19: | ||
In our plot, we'll fill the yellow background with a solid path, and also fill the three black shapes with solid black. | In our plot, we'll fill the yellow background with a solid path, and also fill the three black shapes with solid black. | ||
| + | |||
| + | '''Important note:''' The method shown here, in the next few steps, ''is an advanced method'' to produce a filled region. For an effective, but much easier way to fill regions, use the EggBot Hatch Fill extension. | ||
Latest revision as of 03:17, 15 March 2016
This is part 3 of a tutorial, making a simple drawing in Inkscape and formatting it for the Eggbot.
<<< Part 2 || Smiley Face Tutorial, Part 3
22. About filled regions
In Inkscape, it's easy to color in any path region (say, a circle) with the paint-bucket tool (or solid Fill in the Fill and Stroke pane). However, all that the Egg-Bot sees is the path around the outside, and it will be very happy to just draw the outline for you.
Egg-Bot is a vector printer, not a raster printer. If you ask it to draw a circle, the pen tip actually moves in a circular path on the surface of the object that you're drawing on. This is like an old pen plotter, and very different from an inkjet or laser printer, where the entire surface is scanned back and forth.
This means that if you want to fill in a region, you need to actually construct a path that the pen will trace through the entire filled region. Plots where you fill solid regions can potentially take a long time, so it's a good idea to use alternate methods when possible. However, making solid fills is sometimes the only way to get the effect that you want.
In the procedure that follow, we'll show how you can create a pen path that fills a region, what you might call a "toolpath" in machining terms. This can be a slightly tedious process. The effect is very good though, and it will seem much more straightforward after you've done it a couple of times.
In our plot, we'll fill the yellow background with a solid path, and also fill the three black shapes with solid black.
Important note: The method shown here, in the next few steps, is an advanced method to produce a filled region. For an effective, but much easier way to fill regions, use the EggBot Hatch Fill extension.
23. Starting on the yellow background
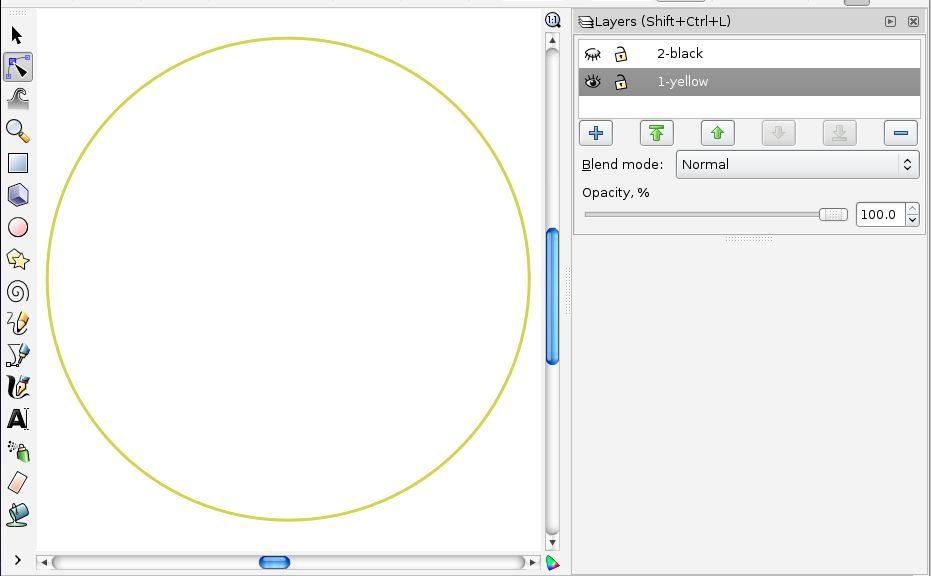
Again, it's easy to hide layers that we don't want to have visible at any given moment. Hide the black layer by clicking the "eye" icon by layer "2-black." What remains is the yellow circle. Select the circle by clicking on it.
24. Open the Path Effect Editor pane
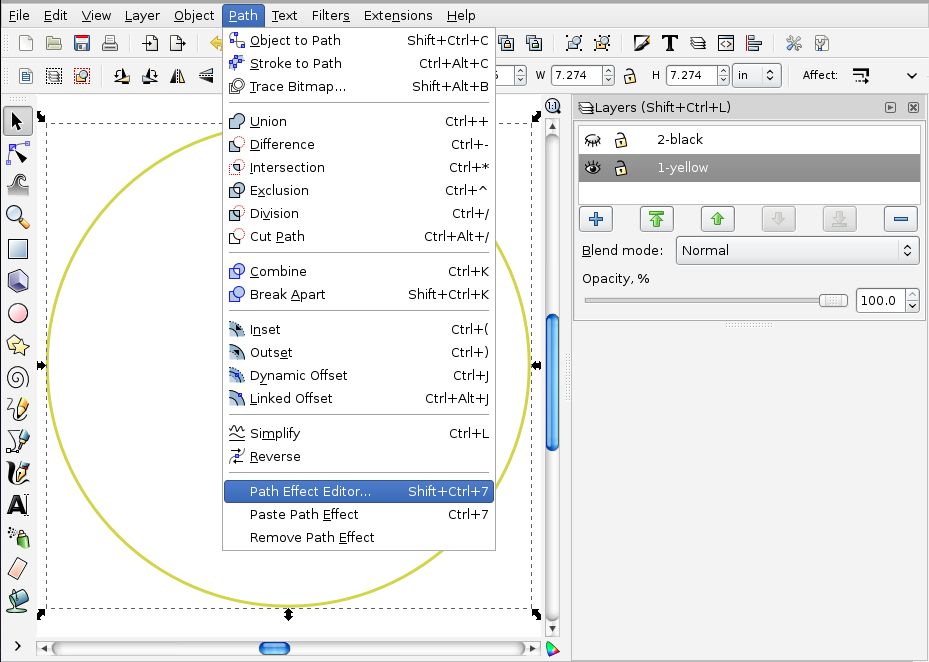
From the Path menu, select "Path Effect Editor…", which pulls up (surprise!) the Path Effect Editor pane.
25. Select and add the hatch effect
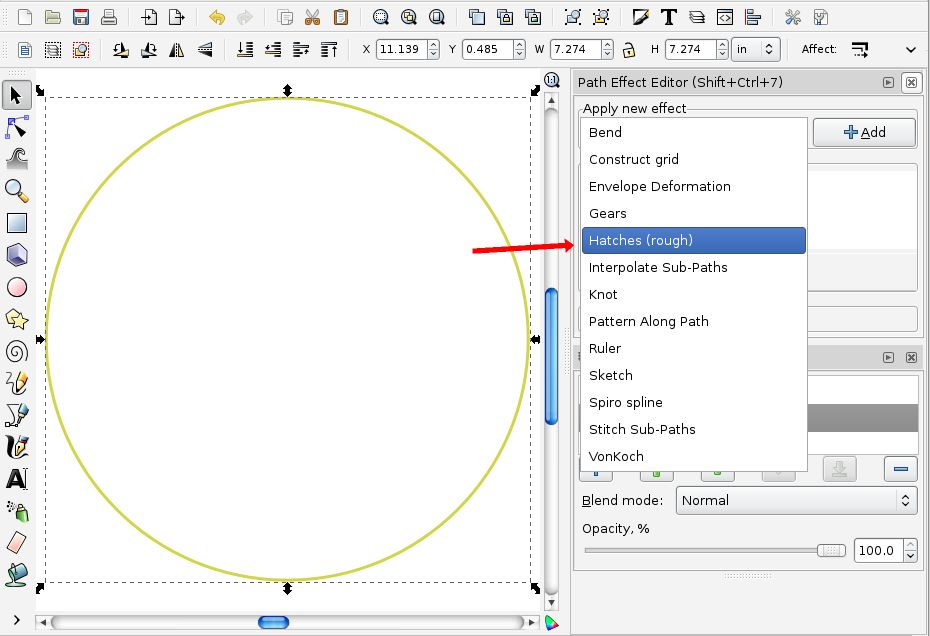
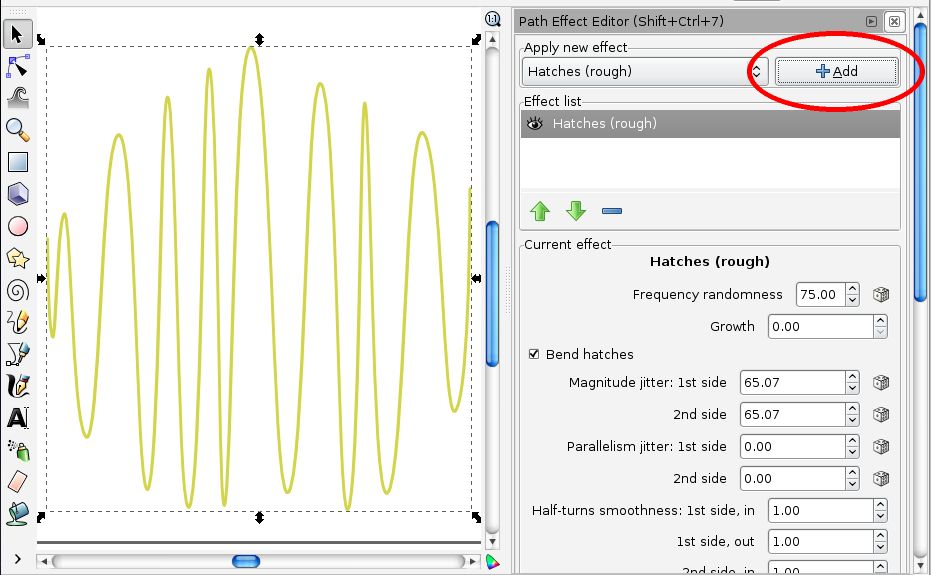
From the popup menu in the Path Effect Editor pane, select "Hatches (rough)" and click the "+Add" button to add it.
26. The hatch effect
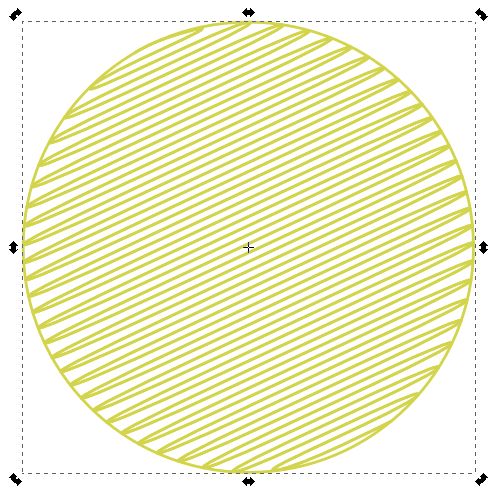
The hatch effect, as it appears in the example above, is a squigly but continuous path that fills the circle region with something that looks like a hand-drawn pencil line. Now, we need to edit the hatch effect to look right. Mainly, we need to *turn off* the different sorts of randomness that makes it look hand drawn. There are two separate ways to enter the parameters: (A): Manually or (B): The easy way, using our extension.
(A) Manually entering the hatch settings. Change the settings for hatches as follows:
- Frequency randomness: 0
- Bend hatches: Uncheck
- Magnitude and parallelism jitter: 0 (all four)
- Half-turns smoothness: 2 (all four)
- Generate thick/thin path: uncheck
(Unfortunately, these settings are not saved by Inkscape and need to be entered every time you add the hatch effect.)
The Path Effect Editor pane should look roughly like this when you finish:
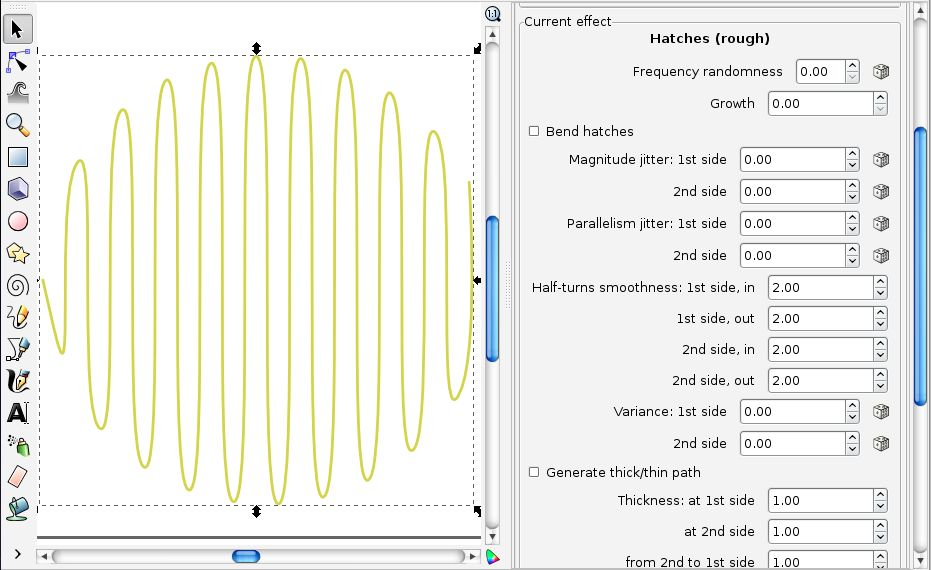
(B) The easy (and recommended) way: enter the settings by using our extension.
A much faster route to the same end result is to use our special purpose Inkscape extension. From the Extensions menu, select EggBot > "Preset hatch for fills..." This extension applies the same settings as under (A) to all objects in the document that already have the hatch effect applied.
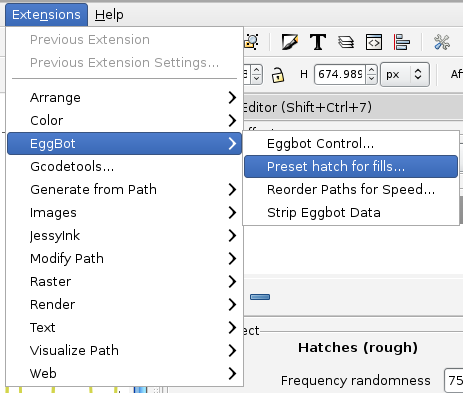
27. Working with the smooth hatch
Now that you've applied the right settings to the hatch effect, whether by method (A) or (B), the squiggles should now appear to be smooth and uniform. However, we still want to change the frequency and maybe angle of the squiggles. You do this with the "Edit Paths By Node" tool, the one below the standard "arrow" tool. Click this tool to select it, and (if the object is not already selected) select the hatched area by clicking on it.
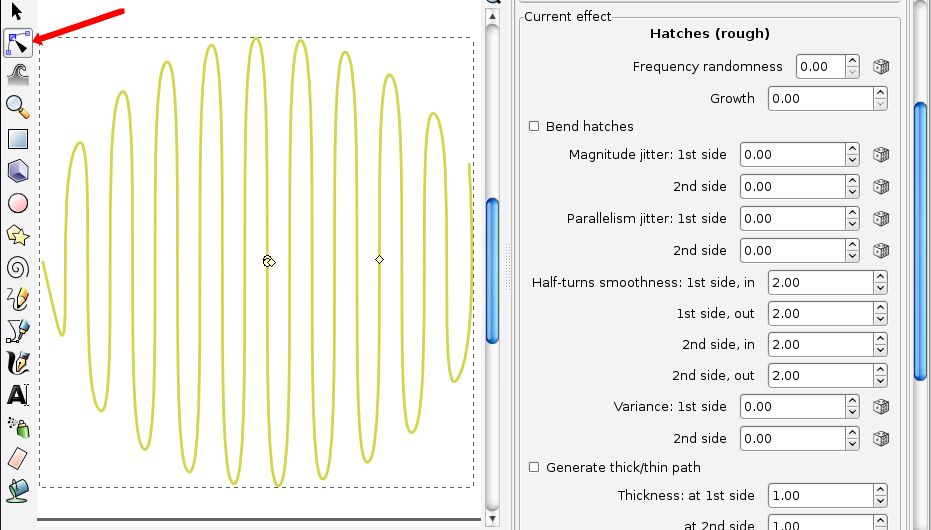
28. Editing the hatch
When you have the object selected, several "control handles" appear near the middle of the squiggle. One of the diamond-shaped ones -- usually the one further away from center -- allows you to change the angle and frequency of the lines. Drag it to a suitable position, such that the area looks like it will get appropriately colored in by the hatches.
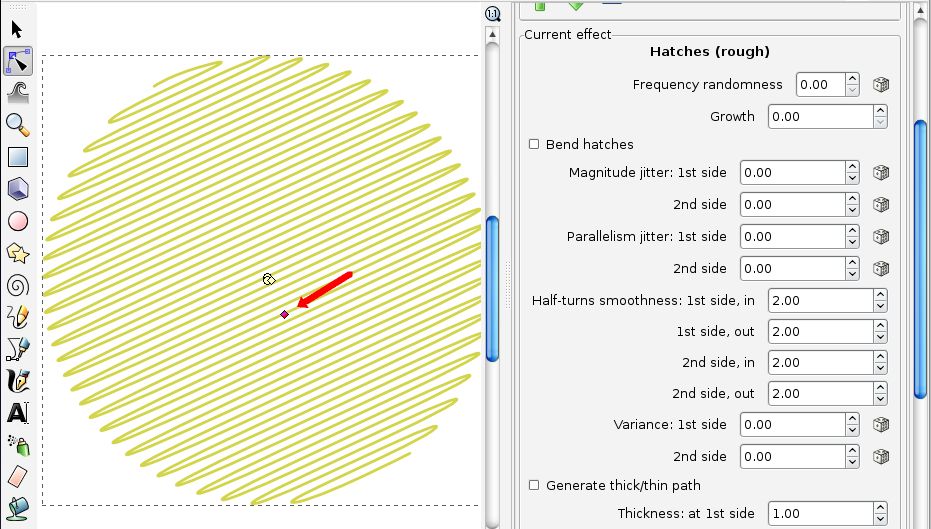
You may find that some positions of the control handles lead to better looking fills than others. Pick one that looks good. One that fills the region without gaps or artifacts, but will not take too long to draw.
29. Adding an outline? (Optional)
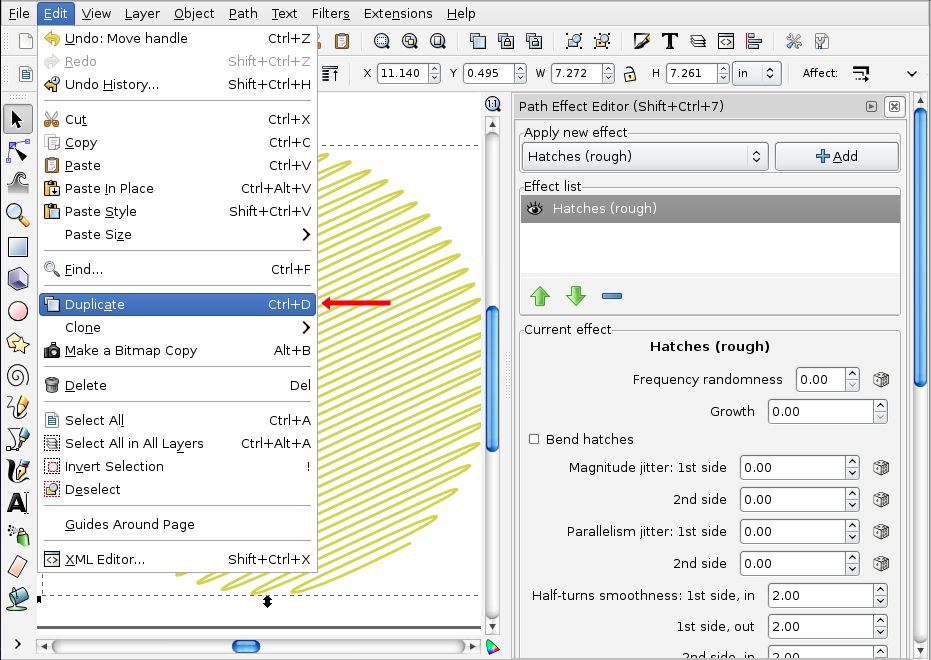
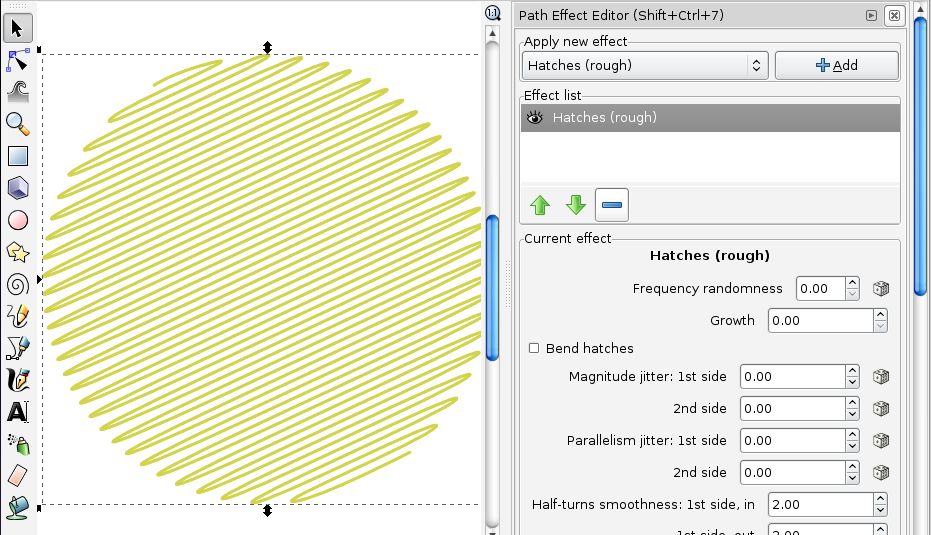
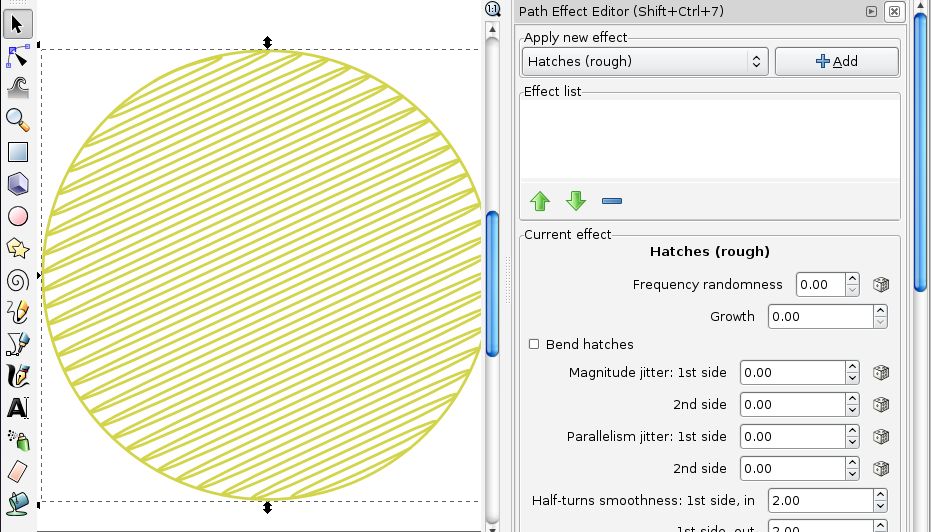
While the hatching that we have will make a nicely filled region, it will no longer have the circular outline that we started with-- the edges of the winding path will be visible. To prevent this, you *may* want to add back in the original circle. Fortunately, the hatches effect is a "live" effect, meaning that it can be edited later, or even removed. Select the yellow hatch path, and from the Edit menu, select "Duplicate" to create an exact copy in place. (You may not see it because it's in the same place.) Now, in the Path Effect Editor pane, click the big "-" button to remove the hatch-fill from your duplicated path, returning it to its original state: a circle.
There is a good reason *not* to do this as well. Often a filled region looks very good on its own, even without an outline. And, if there is any slippage or loss of registration during a plot, the mismatch between a fill and its outline is very visible-- an outline and fill will only look great together if your plot precision is particularly high, and in many cases a good simple plot is a better result than a more precise one that takes a long time to set up.
30. Adding cross hatching? (Optional)
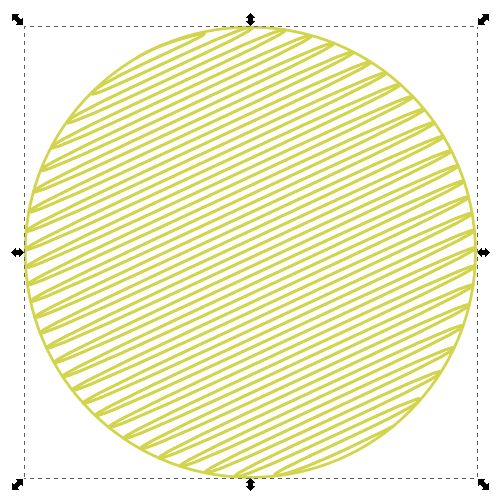
What if we want to use cross hatching on a background fill? That's pretty easy, too. Click on the hatched area with the "normal" arrow tool to select it. Again use Duplicate to make a copy. You may notice that there are arrows on the edges of the bounding box-- indicating that you're in "resize" mode, where you can drag those arrows to resize the shape. If you click on the hatch object again, you see that the arrows turn into "rotation" arrows. Drag one of the corner arrows to rotate the pattern until the result is a pleasing overlapped crosshatch.
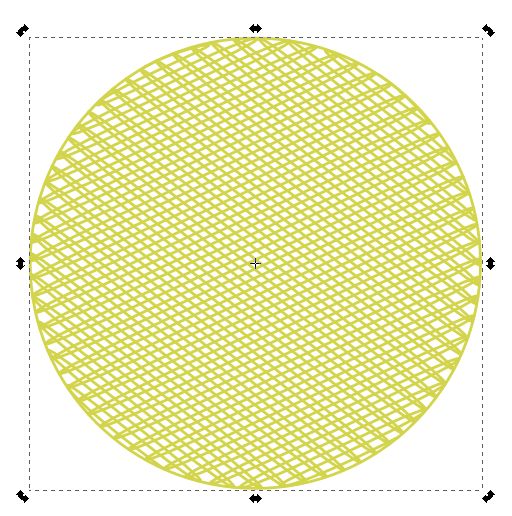
(We don't really need crosshatching, so we're deleting that extra hatch before moving on-- use the delete key or select "Delete" from the edit menu.)
31. Moving on to Black
Now that we're done with yellow, let's move on to black. Show the "2-black" layer and hide the 1-yellow layer in the Layers panel.
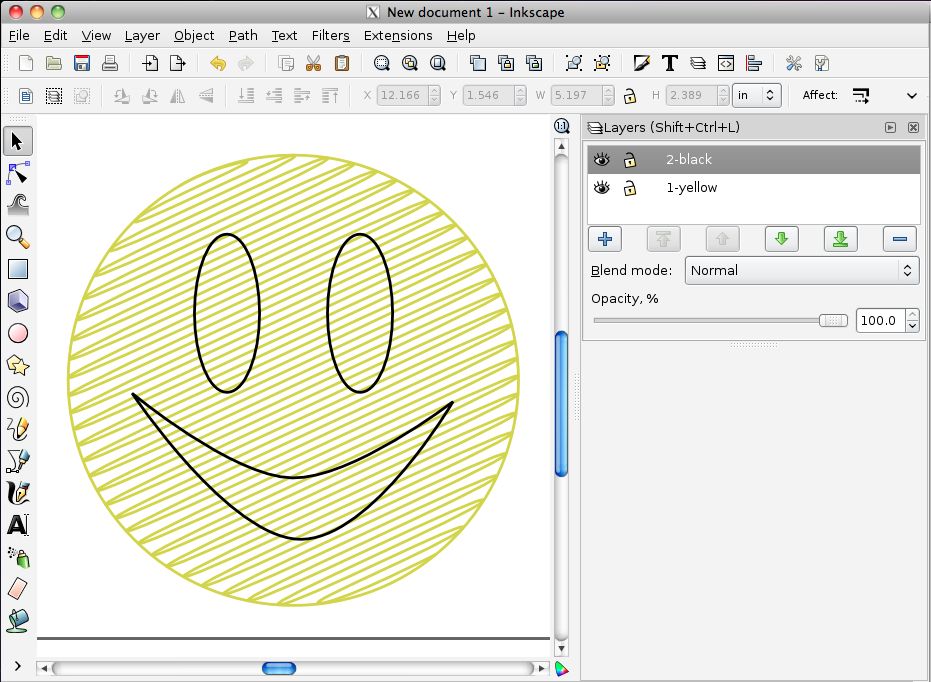
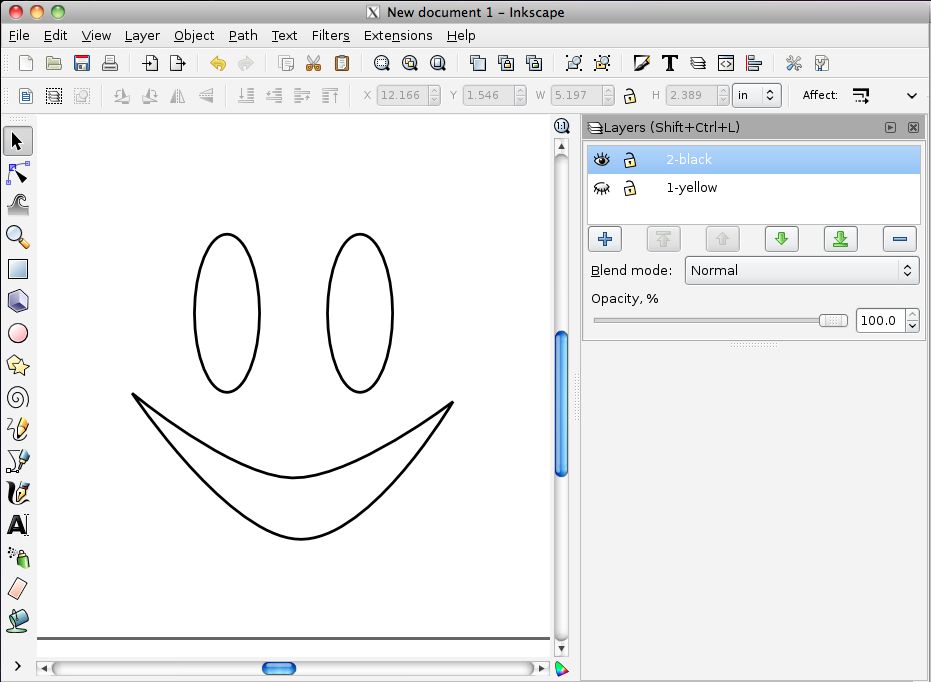
32. Combining paths with the "Union" operation
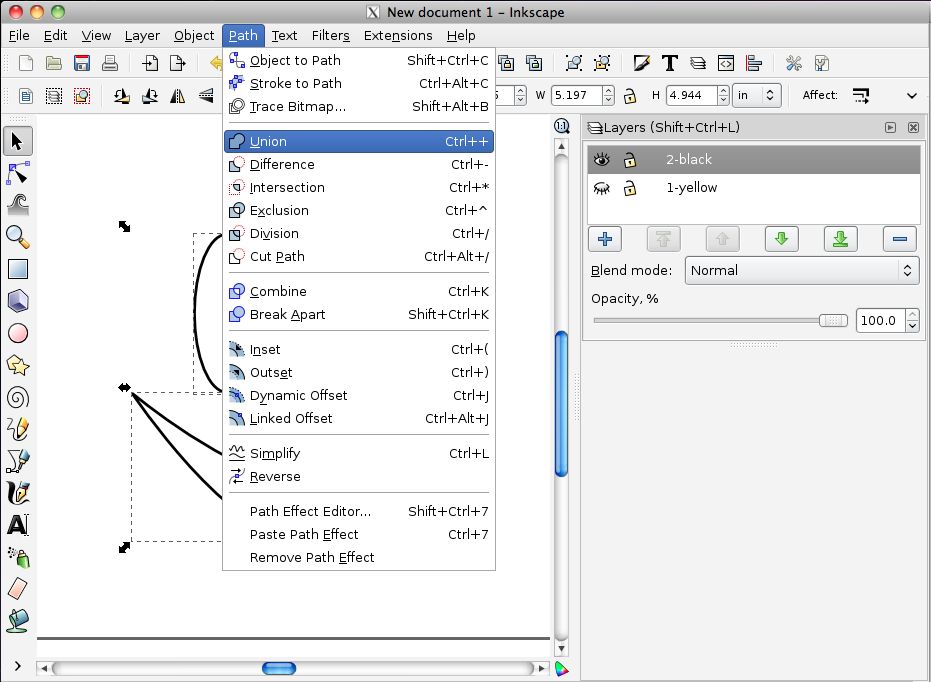
Now, we have three objects that we want to fill with black hatching. You can only apply the hatch effect to a single object at a time, so we can save a few steps then by sticking them together and filling all three at once. Select all three by clicking them with the shift key held down. Then, combine them into a single object by using the "Union" operator in the Path menu. When you do this, the selection changes from being three separate objects selected to one larger object.
33. Wrapping it up
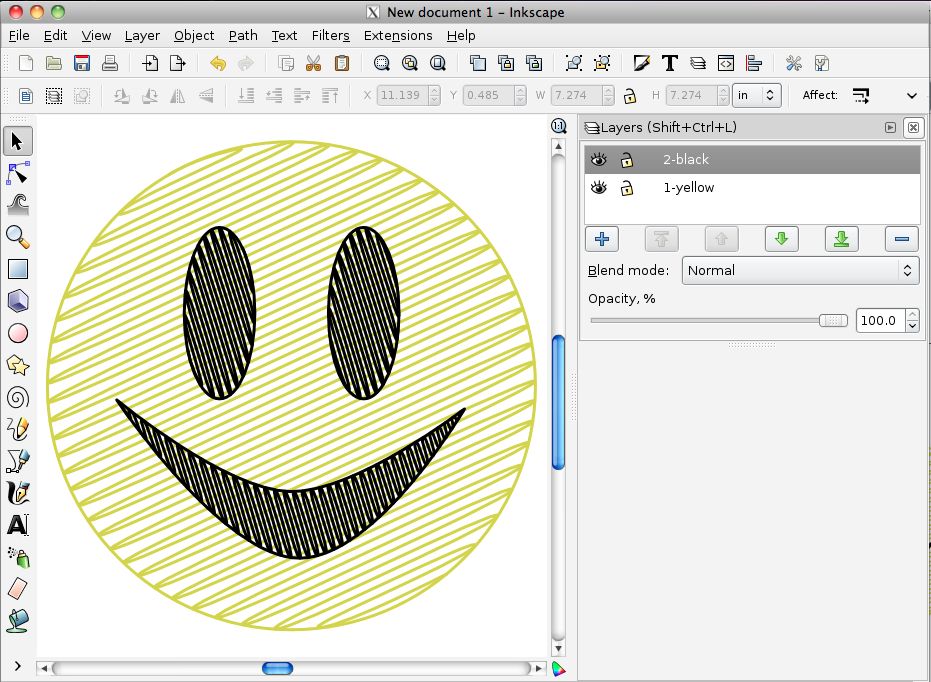
Now, we apply the hatch operation and edit as before to fill them with a black hatch.
And, let's plot it and see how it turns out:
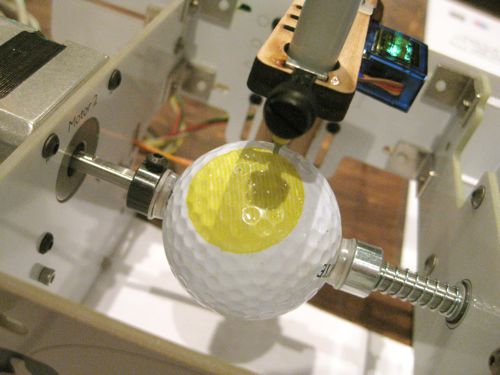
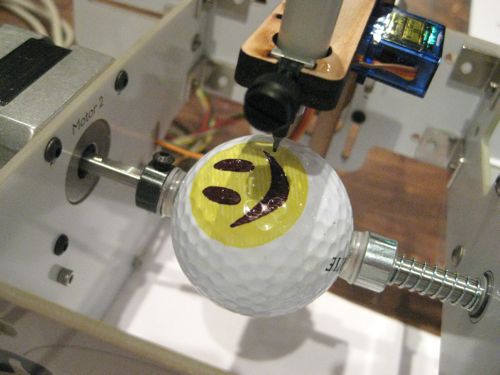
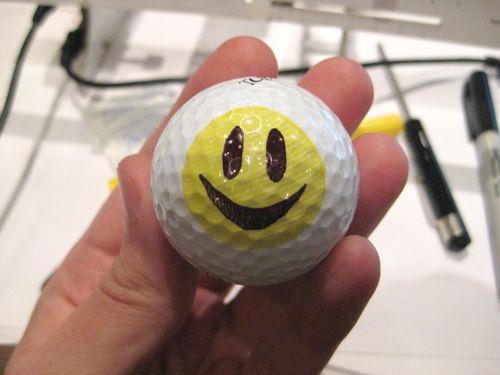
As you see, even works on a golf ball.
This concludes the "smiley face" tutorial. There's more to see on the Egg-Bot Kit page!
<<< Part 2 || Smiley Face Tutorial, Part 3
