AYAB KH-910
Overview[edit]
This page contains documentation about how to physically connect your AYAB Interface to your knitting machine.
This page shows how to connect the AYAB Interface from Evil Mad Scientist to your Brother KH-910 knitting machines, and to similar machines such as the KH-950, and CompuKnit II. For other hardware, please see our main AYAB Hardware Installation page.
Preparing the interface[edit]


The AYAB Interface comes with two plastic covers for the circuit board, as well as cable ties to hold them in place.
These covers have laser-cut openings that expose only the connectors that you will need with the KH-910. There is a different cover for the front and back. The cover for the front has five openings for the connectors as well as a window for the name of the board, and the back side has openings for the power and USB ports.
Fit the two covers into place, loosely attach them to the board with the cable ties, and trim the loose ends of the cable ties. The covers will not sit flat against the circuit board, but instead rest above the various connectors that you are not using on the KH-910.

You will note that next to each connector is a clear label: "S-2", "S-3", "S-5", and so forth. These indicate which connector, and with what orientation, the connectors inside the machine will attach to the AYAB Interface.
Installing the interface[edit]

This is the Brother KH-910 knitting machine. Remove the screws on top of the machine that hold the top cover in place. The top cover comes in three sections, and all three will have to be loosened (or removed) in order to remove the leftmost section that we care about.


Start by lifting up the rightmost part of the cover. Lift it enough that it frees up the center portion of the cover (that with the row counter). Remove this center part and set it aside for a moment.

The left part of the cover should now be free to move.
However, there is a trick to removing it: First, push this left part of the cover to the right (that is, towards the center of the machine).

Then (only after pushing it to the right) gently tilt it up and wiggle it out of place to remove it. (This is because the main circuit board is partially tucked under the turn mark assembly.)

Disconnect all of the cables that connect the circuit board inside this cover to the rest of the machine. The smaller connectors all have locking clip "wings" on their edges. You will have to squeeze the clips as shown above to disconnect them.
If you are opening up the machine for the first time (in 30 years?) you may find that the cables are a bit stiff. It's okay to pull a little extra slack out on the cables to make access easier.

Here is how it should look once all of the cables are disconnected.

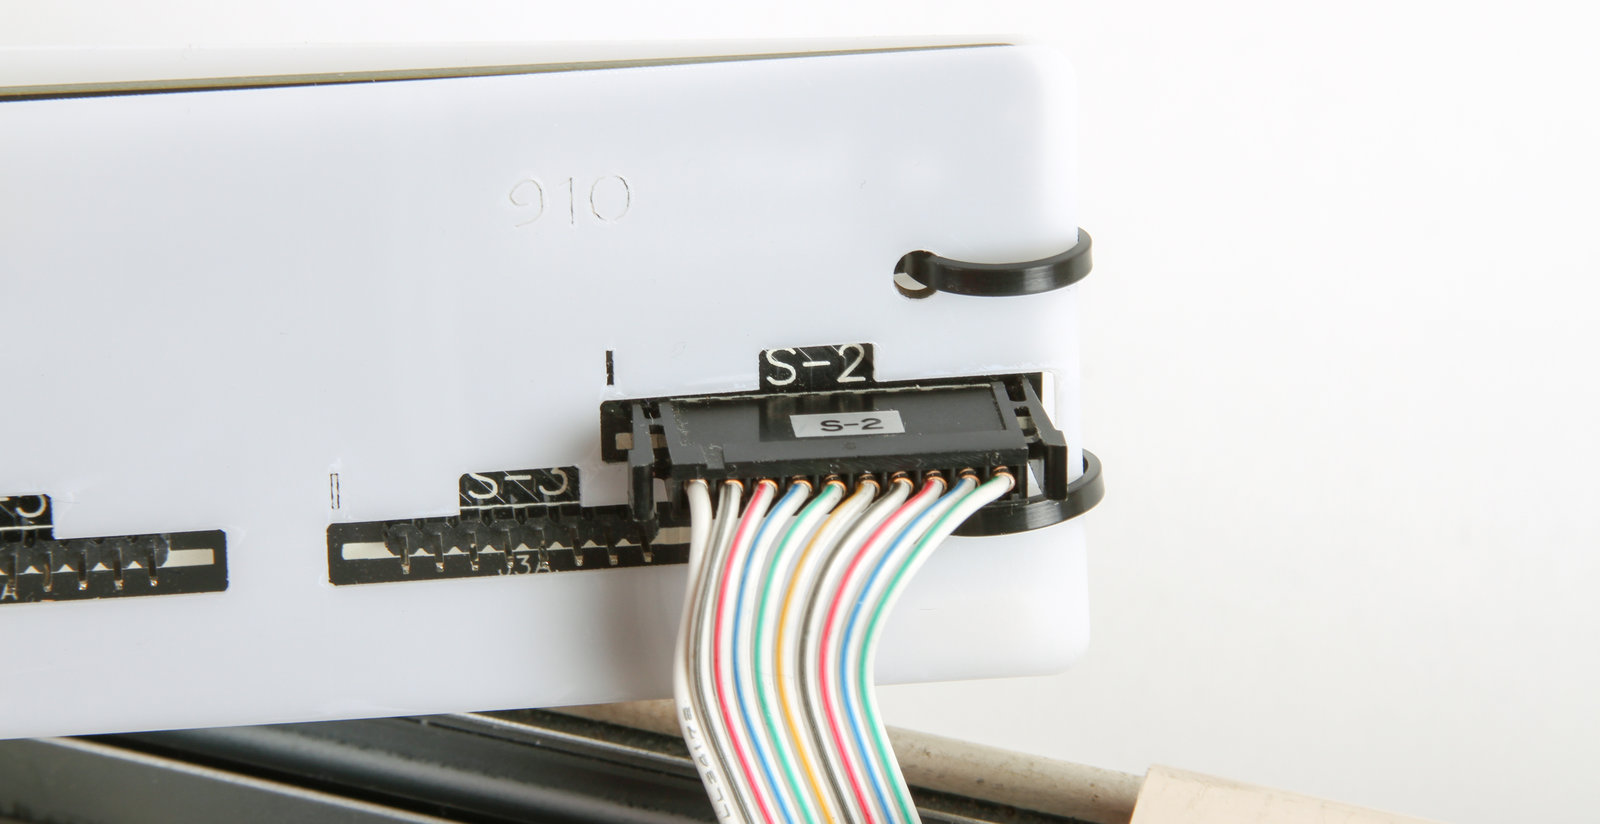
Now, let's attach the first connector to the new AYAB interface. Hold the board as shown here, such that the majority of the exposed connectors are on the right, and identify the cable with the "S-2" label. Attach that cable to the "S-2" connector on the AYAB interface, with the labeled side of the cable connector (the label that says "S-2") facing towards the "S-2" label on the board. (The orientation of the connectors does matter.)
These connectors do not lock into place, but should remain firmly seated thanks to friction.

Next, add the other connectors. Start with "S-3" and work your way over to the others.

Here is how the board should look once all of the connectors have been added.

Note that two data connectors on the knitting machine, "S-4" and "S-6" (shown) are extras, not used by the AYAB interface. Leave them and the large power cable disconnected, and as out of the way as possible.
This completes the installation procedure. It is worth noting that this procedure is fully reversible-- if you wish, you can remove the AYAB Interface and connect all of the original cables back to their labeled locations on the original controller board.
Adding power and USB[edit]

Once the board is fully connected to the knitting machine, it is time to attach power and USB.
The ideal order of operation is as follows:
- Plug the power jack of the included 9 V power supply to the receptacle on the back (top) side of the AYAB Interface.
- Attach the micro-USB cable to the receptacle on the back (top) side of the AYAB Interface.
- Plug in the power supply (or, if on a switched power strip, turn it on).
- Plug the USB port into your computer.
An important note is that the AYAB interface completely replaces the original power supply. Whether or not the original power supply on your machine worked, do not separately plug it into power while using the AYAB Interface, or indeed, any time that the cover is open. Leave the original power cord disconnected!